iPhone tricks: STOP taking screenshots the boring way- Take it this way instead
Want a screenshot of document, page, etc., exceeding your iPhone's screen? You can take a scrolling screenshot. Check the steps here.
 View all Images
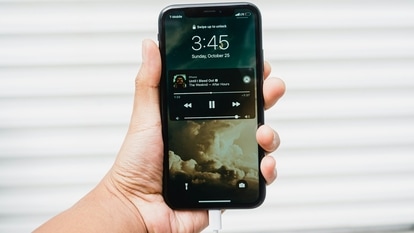
The most common thing we all do if we have to save some details appearing on our phone's screen is to take a screengrab or screenshot. However, what if you have to take a screenshot of a long document or something that is exceeding the screen of your phone? Generally, in such situations, we take more than one screenshot to capture the entire information. But, if you are an iPhone user, you have an option of taking a scrolling screenshot for capturing a full-page, scrolling screenshot of a webpage, document, or email that exceeds the length of your iPhone screen.
"You can take a full-page, scrolling screenshot of a webpage, document, or email that exceeds the length of your iPhone screen, then save it as a PDF," Apple's Support page stated. It can be noted that in order to use this feature you will have to update your iPhone to iOS 16 or later. Here is a step-by-step guide on how to take a scrolling screenshot.
How to take a scrolling screenshot on iPhone
1. You can do any one of the following:
On an iPhone with Face ID: Simultaneously press and then release the side button and volume up button.
On an iPhone with a Home button: Simultaneously press and then release the Home button and side button.
2. Tap the screenshot in the lower-left corner, then tap Full Page.
3. Now, save the screenshot by clicking on Done, choose Save PDF to Files, choose a location, then tap Save.
4. You can also share the screenshot by tapping the Share button, choose a sharing option (for example AirDrop, Messages, or Mail), enter any other requested information, then send the PDF.
How to take a screenshot on iPhone
On an iPhone with Face ID: Simultaneously press and then release the side button and volume up button.
On an iPhone with a Home button: Simultaneously press and then release the Home button and side button.
Tap the screenshot in the lower-left corner, then tap Done.
Choose Save to Photos, Save to Files, or Delete Screenshot.
If you choose Save to Photos, you can view it in the Screenshots album in the Photos app, or in the All Photos album if iCloud Photos is turned on in Settings > Photos.
Catch all the Latest Tech News, Mobile News, Laptop News, Gaming news, Wearables News , How To News, also keep up with us on Whatsapp channel,Twitter, Facebook, Google News, and Instagram. For our latest videos, subscribe to our YouTube channel.


