Link Aadhaar with IRCTC to book up to 12 Railways tickets; check how to do it online
By linking Aadhaar with IRCTC Railways passengers can book up to 12 tickets and this can be done easily from home; check how to do it online

How to link Aadhaar with IRCTC: People have now started moving out of their homes and are frequently travelling to different places as the coronavirus pandemic eases a little. If you are planning to travel and have to book Railway tickets on IRCTC, then here is an update for you. The Indian Railway Catering and Tourism Corporation (IRCTC) has informed that railway passengers that they are allowed to book up to 12 tickets in a month. "Now users are allowed to book up to 12 tickets in a month, if they get themselves verified through their Aadhaar number along with at least one passenger also being verified through Aadhaar," IRCTC said.
It also informed that IRCTC does not require Aadhaar verification for booking up to 6 tickets in a month - the existing facility of booking up to 6 tickets (without Aadhaar) in a month has been allowed to continue. If you want to book more than 6 tickets and up to 12 tickets in a month on IRCTC website then here is all you need to know:
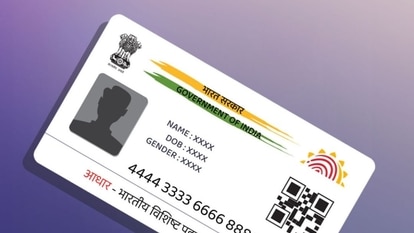
IRCTC registered user is required to get himself Aadhaar verified using Aadhaar KYC option in My Profile. Also, at least one passenger on the ticket being booked, beyond 6 tickets in a month, should also be Aadhaar verified.
Aadhaar verification process: You can verify your IRCTC User ID with Aadhaar.
Step 1: Open www.irctc.co.in in your web browser.
Step 2: Enter your login credentials and Sign In.
Step 3: Go to MY ACCOUNT tab and select Link Your Aadhaar.
Step 4: Aadhaar KYC page will appear, enter your Name as per Aadhaar Card, provide Aadhaar Number or Virtual ID, select the checkbox and click on Send OTP button.
Step 5: Provide the OTP received on your Aadhaar Registered Mobile number and click Verify OTP button.
Step 6: KYC response is fetched from Aadhaar. Click Update button to complete the Aadhaar verification process.
Step 7: Pop-up window with confirmation message will appear. After that close the window and login again at www.irctc.co.in.
Step 8: Aadhaar KYC status can be checked on selecting the Link Your Aadhaar link under MY ACCOUNT tab on top navigation of IRCTC eTicketing website.
How to verify passengers with Aadhaar?
Step 1: Open www.irctc.co.in in your web browser.
Step 2: Go to Add/Modify Master List link in My Profile under MY ACCOUNT tab at IRCTC homepage. (MY ACCOUNT >> My Profile >> Add/Modify Master List).
Step 3: Provide all the details i.e. Name, Date of Birth, Gender, Berth Preference, Food Preference, Senior Citizen Concession (if applicable), ID Card Type and ID Card Number (Aadhaar Number).
Step 4: Click on the Submit button.
Step 5: Passenger with details provided will be added in Master List and same can be viewed in the Saved Passenger List.
Step 6: To verify the Aadhaar verification details of passengers, click on the “Click here to check pending Aadhaar Verification Status”. If the details are correct, then Verification Status will be changed to Verified and Success alert will be displayed on the screen.
Steps to book more than 6 and upto 12 tickets in a month:
Step 1: After successful login, enter the journey details and proceed for booking.
Step 2: At the train list page, select the desired train/class and continue booking.
Step 3: At passenger input page, Click on PASSENGER NAME and select the Aadhaar Verified passenger from the displayed list. This displayed list will enlist all of the passengers added in the Master List.
Step 4: Passenger details will be automatically fetched on the Reservation form.
Step 5: Only one of the travelling passengers should be Aadhaar verified and to be selected by clicking on PASSENGER NAME. Details of rest passengers can be submitted through keyboard.
Step 6: Continue Booking process.
Step 7: Review booking details and check the Aadhaar number displayed under Travelling Passengers.
Step 8: Select the payment gateway of your choice and continue to payment page. On successful payment, booking confirmation page will displayed.
Catch all the Latest Tech News, Mobile News, Laptop News, Gaming news, Wearables News , How To News, also keep up with us on Whatsapp channel,Twitter, Facebook, Google News, and Instagram. For our latest videos, subscribe to our YouTube channel.


