This HIDDEN iPhone feature will kill off unnecessary swipes, save time and effort | Mobile News

This HIDDEN iPhone feature will kill off unnecessary swipes, save time and effort

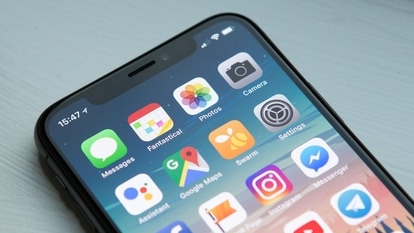
Back Tap is the most underrated and unused feature of iOS! iOS 15 had a grand reception, bringing with it a host of new features such as the much-awaited widgets. However, the one feature that has been overlooked by most people has been present since iOS 14 – the Back Tap.

By: SHAURYA TOMER
| Updated on: Feb 24 2022, 13:21 IST
iPhone
The iPhone Back Tap feature is supported by iOS 14 and later versions. (Pexels)
1/9 The iPhone Back Tap feature is supported by iOS 14 and later versions. (Pexels)
iPhone
The iPhone Back Tap feature is off by default but it can be set up manually through the ‘Settings’ app. (Pexels)
image caption
2/9 The iPhone Back Tap feature is off by default but it can be set up manually through the ‘Settings’ app. (Pexels)
iPhone
This feature lets you set up an extensive list of options like take a screenshot, open control center, enable features like VoiceOver, Assistive Touch, Zoom, open camera, mute your device, access Siri and can even bypass lock screen. (Pexels)
image caption
3/9 This feature lets you set up an extensive list of options like take a screenshot, open control center, enable features like VoiceOver, Assistive Touch, Zoom, open camera, mute your device, access Siri and can even bypass lock screen. (Pexels)
This feature is especially useful in situations when you’re in a hurry. It saves you multiple taps and swipes – from toggling a flashlight to taking a screenshot.
This feature is especially useful in situations when you’re in a hurry. It saves you multiple taps and swipes – from toggling a flashlight to taking a screenshot. (Pexels)
image caption
4/9 This feature is especially useful in situations when you’re in a hurry. It saves you multiple taps and swipes – from toggling a flashlight to taking a screenshot. (Pexels)
To set up Back Tap, first you need to ensure that your device is running on iOS 14 or later. If you’re running iOS 13 and below, then you’ll need to update before you can set it up.
To set up Back Tap, first you need to ensure that your device is running on iOS 14 or later. If you’re running iOS 13 and below, then you’ll need to update before you can set it up. (Pexels)
image caption
6/9 To set up Back Tap, first you need to ensure that your device is running on iOS 14 or later. If you’re running iOS 13 and below, then you’ll need to update before you can set it up. (Pexels)
Open the ‘Settings’ app on your iPhone, scroll down to find Accessibility and tap on it.
Open the ‘Settings’ app on your iPhone, scroll down to find Accessibility and tap on it. (Pixabay)
image caption
7/9 Open the ‘Settings’ app on your iPhone, scroll down to find Accessibility and tap on it. (Pixabay)
Tap on Touch and scroll down to find the Back Tap option. You’ll find two options – Double Tap and Triple Tap.
Tap on Touch and scroll down to find the Back Tap option. You’ll find two options – Double Tap and Triple Tap. (Pexels)
image caption
8/9 Tap on Touch and scroll down to find the Back Tap option. You’ll find two options – Double Tap and Triple Tap. (Pexels)
iPhone
Tap on Double Tap and select the shortcut you want the double tap feature to access. Similarly, tap on the Triple Tap and select the shortcut you want You can select either or even both of them. (Pexels)
image caption
9/9 Tap on Double Tap and select the shortcut you want the double tap feature to access. Similarly, tap on the Triple Tap and select the shortcut you want You can select either or even both of them. (Pexels)
iPhone
Back Tap is also well integrated with the ‘Shortcuts’ app. Therefore, you can, not only use it to perform the set functions, but you can also create your custom shortcuts! (Pexels)
image caption
10/9 Back Tap is also well integrated with the ‘Shortcuts’ app. Therefore, you can, not only use it to perform the set functions, but you can also create your custom shortcuts! (Pexels)
First Published Date: 24 Feb, 13:21 IST
NEXT ARTICLE BEGINS